Growing marijuana indoors can seem expensive at first glance. The flashy tents, high-output lights, and racks of controllers on social media make it look like a luxury hobby. But with a little planning, patience, and willingness to accept trade-offs, you can produce a respectable yield without draining your savings. I learned that the hard way the first time I tried to scale down: a $600 setup is tempting, but a $120 setup taught me more about plants than all the gear ever did.
This guide walks through a pragmatic, budget-minded approach. It covers the essentials you cannot skip, sensible compromises that keep costs low, and practical tips from someone who’s grown cannabis both in full-blown setups and in tiny, improvised closets. Wherever possible I’ll give concrete numbers, example costs, and common mistakes to avoid.
What budget means here Budget can mean different things. For this article, think of budget as a modest, one to two plant indoor grow with total startup costs roughly in the $100 to $300 range, excluding seeds or clones. If you want more plants, automated systems, or higher yields, costs scale up. The goal is healthy plants and decent flower without buying the most expensive name-brand equipment.
Essential supplies checklist Keep this short, clear, and focused. These are the items you need to start growing indoors on a shoestring.
- a light source suitable for a small grow area (see options below) a container for the plant, a breathable pot if possible growing medium, either soil or a soilless mix ventilation, at least a small fan and a way to exchange air basic nutrients and pH testing method
Choose your space first Successful small-scale grows start with choosing the right space. Closets, spare bathrooms, and small cabinets work well as long as they are private, relatively clean, and can be modified for light and airflow. Avoid basements with heavy humidity unless you can control moisture. A space approximately 2 feet by 2 feet is large enough for one or two plants in 3 to 5 gallon pots.
Think about accessibility. You will be watering, pruning, checking for pests, and maybe adjusting lights every few days. If you need to duck into a cramped cabinet and fumble, you will skip tasks. A slightly larger space that lets you move comfortably reduces mistakes.

Lighting on a budget Light is the single most important budget decision. Plants need the right spectrum and intensity. The cheapest impulse buys are often ineffective long-term. Here are three viable low-cost options that have worked in real setups, with pros and cons.
- Compact fluorescent lamps (CFLs): These are cheap, around $10 to $20 per bulb, and easy to fit in small spaces. Use daylight or full-spectrum bulbs in the 23 to 65 watt range. CFLs are best for one plant or for seedlings and the vegetative stage. They run cooler than many lights, which helps in small enclosures. Light penetration is limited though, so yields will be modest compared to higher-intensity lamps. T5 fluorescent fixtures: A four-bulb T5 fixture costs about $50 to $120 new, often less used. They provide good light spread for multiple small plants or a single larger plant in veg. T5s work well for clones and early veg since they distribute light evenly. They are less efficient in flower because they lack the intensity of LEDs or HPS. Budget LED panels: Small, well-chosen LED panels in the $60 to $150 range can be surprisingly effective. Many inexpensive panels claim impossible wattages, so look for measured par values or buy from a seller with good reviews. An LED rated around 150 to 200 true watts will cover a 2 by 2 area for flower. Advantages include energy efficiency and low heat output. The main risk is buying a low-quality panel that underperforms.
If you must pick one all-purpose choice for a single small grow, a quality budget LED panel beats CFLs for flowering. If cost really matters and you only want to veg or grow one small plant, CFLs will work.
Containers and medium Plastic pots are cheap and do the job, but fabric pots breathe better and reduce overwatering problems. Ten dollar fabric pots of 3 gallons are widely available and are a sensible middle ground. If you use plastic pots, make sure they have adequate drainage holes.
For the growing medium, plain potting soil with added perlite is the easiest and cheapest route. Mix two parts good-quality potting soil with one part perlite. You can also start with a soilless mix like coco coir, which drains well and is reusable after proper flushing, but it requires more attention to nutrients and pH.
A common budget trap is buying "special" soils that are overpriced and offer little advantage. Focus on soil that drains and contains organic matter. If you reuse soil between grows, bake it in the sun and refresh with compost and perlite.
Ventilation and odor control Plants need fresh air. A small clip fan circulating air across the canopy and a passive intake for fresh air will keep pests and mold down. A clip fan costs $10 to $15, and you can point it to create gentle movement. For air exchange, a basic inline fan becomes necessary when odor or heat control is important. A decent inline fan suitable for a 2 by 2 area might Informative post cost $40 to $80.
Odor control is optional if privacy is not a concern, but if it is, cheap carbon filters exist and can be paired with an inline fan. You can also reduce odor by timing flower stages or ventilating when you are home. If you cannot afford a true carbon filter, at least ensure air is being exchanged outside the grow space to disperse smell.
Nutrients, water, and pH Plants need nitrogen, phosphorus, potassium, and trace elements. For a budget grow, a basic two-part nutrient solution labeled for cannabis or flowering plants is fine. A simple bottle of vegetative nutrients and a flowering formula will cost $20 to $40 each and last several cycles.
If you want to cut costs further, organic amendments like bat guano, worm castings, or fish emulsion can work, but they introduce variability and stronger odors. For beginners, bottled nutrients with clear feeding charts reduce guesswork.
Testing pH matters much more than a fancy nutrient brand. Most municipal water ranges from pH 6.5 to 8.0. Cannabis prefers slightly acidic conditions, about pH 5.8 to 6.5 in soilless mixes and around 6.0 to 7.0 in soil. A basic pH meter costs $15 to $30. pH test strips are cheaper but less reliable. Skipping pH checking is the fastest path to nutrient lockout and poor growth.
A simple watering rhythm: water until runoff equals about 10 to 20 percent of the pot volume, then wait until the top inch or two of soil is dry before watering again. Overwatering is the single most common beginner mistake.
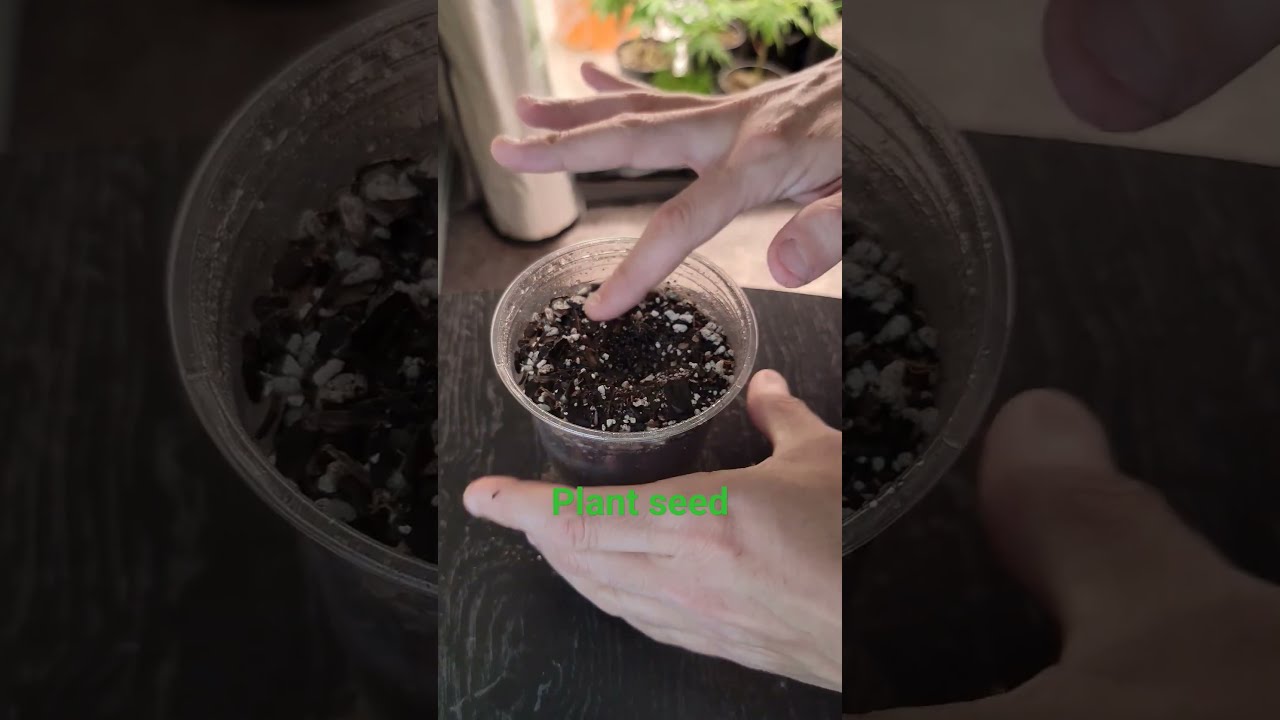
Seeds or clones Seeds are often cheaper, but feminized seeds cost more than regular seeds and reduce the risk of male plants. A pack of regular seeds might be $10 to $30 for several seeds. Clones cost more per plant but are guaranteed female and save you the early vegetative period.
If you pick seeds, start multiple since some may not germinate. For a one to two plant setup, buy four to six seeds and plan to select the best two. If legal restrictions matter where you live, check your local laws before acquiring seeds or clones.
Training and canopy management You can dramatically improve yield per watt with simple training techniques. Low stress training, where you gently bend branches and tie them down to create a flatter canopy, yields better light distribution and more even bud development. High stress training, like topping or scrogging, requires more skill but can be done on a budget with a homemade screen.
An example from a small closet: I trained a single plant into a broad canopy by tucking branches under garden ties and rotating the pot weekly. The plant filled the space evenly and produced buds that dried faster and tasted better than the vertical, single-cola plant I'd grown before.
Pruning and defoliation should be conservative. Remove large fan leaves that block light after the plant has grown beyond the seedling stage, but avoid stripping too many leaves during intense growth. The plant uses leaves for energy, and over-pruning will slow development.
Flowering and timing Flowering time depends on the strain, usually 7 to 11 weeks for most feminized indicas and hybrids. Sativa-dominant strains often take longer. You control flowering indoors by changing the light schedule to 12 hours light and 12 hours dark. Make sure the dark period is uninterrupted; light leaks during the night cycle can stress plants and cause hermaphroditism.
Expect smaller yields in a budget setup. A realistic target for a single plant under a modest LED or CFL array is about 1 to 4 ounces dry, depending on genetics and grower skill. If you are trying to maximize output per plant, allow slightly larger pots, vigorous training, and full flowering light intensity.
Harvesting, drying, and curing A cheap harvest is wasted without proper drying and curing. Drying needs a dark, cool space with gentle air circulation. Hang trimmed branches or use a drying rack in a closet with a small fan blowing indirectly. Ideal drying conditions are about 60 percent relative humidity and 60 to 68 degrees Fahrenheit. Drying typically takes 7 to 14 days.
Curing is where flavor and smoothness develop. Place dried buds loosely in glass jars and open them daily for the first week to exchange air and release moisture. After the first week, reduce burping frequency to once every few days. Proper curing for two to four weeks improves taste and smoke quality dramatically. Skipping cure and tossing buds in a bag will save time and money but will yield harsher smoke and less pronounced aromas.
Budget-savvy upgrades that matter If you have a little extra to spend, some upgrades give the best return on investment.
- Upgrade the light first. A better LED improves yield and reduces electricity costs, paying for itself over a few cycles. Buy a pH meter. It stops nutrient issues before they cut yields. Invest in fabric pots if you struggle with root rot or overwatering. Get a small inline fan and a carbon filter if odor and heat are concerns.
Avoid gadgets that add complexity without predictable benefit. Timers, multiple controllers, and sophisticated monitors are lovely, but the basics buy more plant growth per dollar.
Common problems and simple fixes Root-bound plants: repot into a larger container early in veg, or train roots by loosening the soil surface. Crowded roots limit growth and make plants more sensitive to watering.
Nutrient burn: reduce feeding strength by half if leaf tips curl and brown. Flush with plain pH-balanced water if severe, then resume with milder feedings.
Pests: whiteflies, spider mites, and fungus gnats are the most common. Sticky traps, neem oil sprays, and introducing predatory insects are all options. For a budget grow, keep cleanliness high, avoid overwatering, and quarantine new plants before mixing them with established ones.
Light burn: raise lights or reduce power if leaves bleach at the top of the canopy. CFLs and T5s are forgiving; LEDs and HPS need more distance.
An anecdote about mistakes worth sharing On my second grow I trusted a cheap LED with impressive marketing. It cost me $90 and arrived with flimsy heatsinks and inflated wattage claims. The plants showed purple stems and slow growth which I initially blamed on genetics. After replacing the LED with a reputable 150 watt panel and correcting pH, growth resumed rapidly. The lesson: measured performance of lights matters. Save money by choosing lower-power lights that are honest rather than chasing high-watt claims.

Energy and cost calculations Electricity is a recurring cost that often gets overlooked. A 150 watt LED running 18 hours a day in veg consumes about 2.7 kWh per day. At $0.15 per kWh that is roughly $0.40 per day or about $12 per month during veg. Flowering at 12 hours a day reduces that cost by a third. CFLs draw more relative power for the same usable light on the plant, so LEDs can save money over time.
If you budget $200 for initial setup and expect $20 to $40 per month in utilities and nutrients, three grows per year could be sustainable and cost-effective compared to buying similar-quality product retail. Exact numbers depend on yield and local electricity prices.
Legal and safety considerations Growing laws vary widely. Make sure you know the legal status and allowable limits where you live before starting. Safety is also important. Electrical fires can start from overloaded circuits or cheap timers. Use grounded outlets, avoid daisy-chaining power strips, and keep water away from electrical connections. Fire-safe your grow area by mounting fixtures properly and checking wiring regularly.
A final realistic perspective A budget indoor grow will not compete with a commercial operation. Expect smaller yields and more hands-on time. You will learn a lot by doing, though; many growers who started on a shoestring moved to larger setups later with a deep understanding of their craft. If the goal is self-sufficiency and enjoyment, modest setups deliver in spades. If the goal is large, consistent yields, plan to spend more on quality lights, ventilation, and automation.
Grow one plant well before expanding to several. Keep records of strains, feeding schedules, and environmental conditions. Small notebooks, a simple spreadsheet, or photos will reveal trends that matter more than gear. With patience, attention to detail, and the right compromises, you can produce satisfying cannabis at a fraction of the cost high-end setups demand.